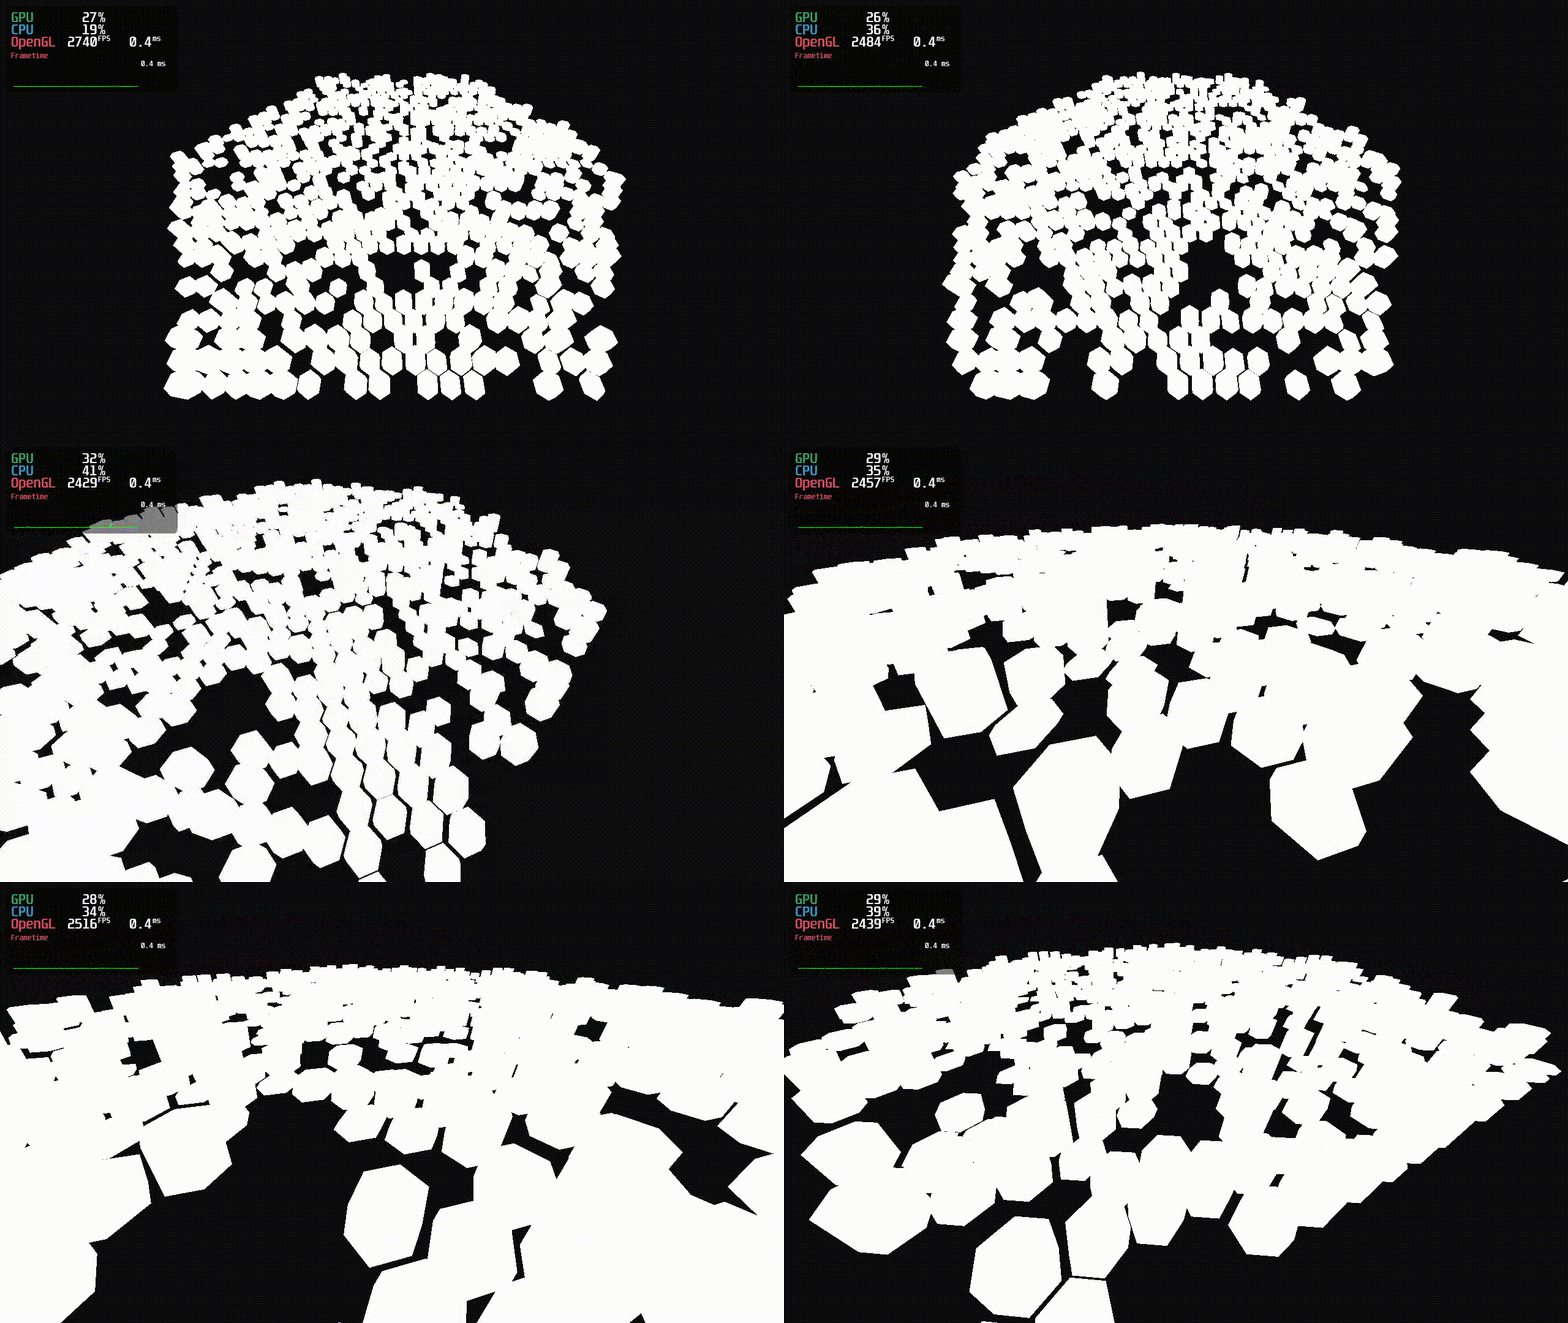
GitHub repository for HexagonalHS can be found here.
What is this?
This is just a simple 3D demo of some hexagonal prisms being rendered with code written in Haskell. Each prism is a hexagonal tile with a discrete, randomly generated height, to give the appearance of a simplified heightmap. I wanted to see how far I could push the program and see if a 3D game in Haskell is possible since I was experiencing performance problems rendering lots of entities in SDL.
Initially, this project was going to be the prototype of a game I’ve been wanting to make for a while, but after getting this far, I realised that my workflow for using Haskell was a little bit too bloated and frustrating for my liking. Similarly, the next part of this project was implementing a 3D animation system, and since I program functionally for recreational purposes I really don’t want force myself to continue when I’m not prepared to do so.
In the past, I’ve talked about Haskell as being my favourite language. I’ve learned a lot from it, but ultimately with my new job I’ve had less time to work on hobby projects. I’ve made the decision to move away from Haskell and explore Common Lisp. One of my projects, Space, gave me a very colourful insight into this new world of Lisp and I’m excited to jump into new things. I want to embrace the functional paradigm without reinventing the progress we’ve already made with traditional imperative methods — you’ll see more about this in my future posts!
How do I use it?
The camera uses simple first-person flying controls — WASD to move, Space and C to ascend and descend, and Right Mouse Button to look around. Pressing F1 regenerates the level instantaneously.
The performance measuring widget isn’t bundled with the executable. In the preview, I used MangoHud because it’s a very slick way of measuring FPS and rendering times — I highly recommend its usage on projects like this where garbage collectors are involved for profiling purposes.
How does it work?
This project is largely a port of the tutorials found on learnopengl.com. It was very interesting seeing the problems that came from trying to replicate imperative code in a functional scope. I am especially proud of how I loaded and stored resources:
-- Store a resource along with a way of loading it
data Resource a = Resource
  { resource        :: Maybe a
  , resourceLoader  :: IO (Maybe a)
  }

-- Store resources by type and name
data Resources = Resources
  { _shaders  :: RMap Shader
  , _meshes   :: RMap Mesh
  }

-- Attempts to retrieve a loaded resource
tryGet :: MVar Resources -> RInfo -> RLens a -> IO (Maybe a)
tryGet mR info@(t, name) lens = do
  rs <- readMVar mR
  let maybeRes = Data.Map.Strict.lookup name $ view lens rs
  case maybeRes of
    (Just (Resource r _)) ->
      case r of
        (Just res) -> pure $ Just res
        _ -> tryLoad mR info lens
    _ -> do
      putStrLn $
        "[Error] Could not find " ++ t ++ ": '" ++ name ++ "'."
      pure Nothing

-- Try and load an unloaded resource
tryLoad :: MVar Resources -> RInfo -> RLens a -> IO (Maybe a)
tryLoad mR info@(t, name) lens = do

  -- Declare the resource to load
  putStrLn $ "Loading " ++ t ++ ": '" ++ name ++ "'.."

  -- Retrieve resources from mvar
  rs <- takeMVar mR

  -- Get the element to load and the accessor to place it
  let res@(Resource _ l) = view lens rs ! name

  -- Use the loading function to try and load the resource
  maybeRes <- l
  case maybeRes of

    -- If a resource was loaded, update collection
    (Just r) -> do
      let newRs = over lens (insert name res { resource = maybeRes }) rs
      putMVar mR newRs
      pure maybeRes

    -- If nothing was done, do nothing
    _ -> do
      putStrLn $ "[Error] Failed to load " ++ t ++ ": '" ++ name ++ "'."
      putMVar mR rs
      pure Nothing
Resources are stored with a loading function specialised to the specific resource — when loading a texture foo.png, the filepath is curried with the texture loading function and stored so that it can be loaded and retrieved upon request:
-- Display the scene
onRender :: GameScene -> [Uniform] -> App ()
onRender gs uniforms = do

  -- Retrieve map shader
  Env { envResources = rs } <- ask
  mapShader  <- liftIO $ getShader rs "map"

  -- Render the map with global uniforms
  R.render (gameSceneMap gs) mapShader uniforms
That snippet also showcases my Uniform implementation in use. In graphics, a uniform is a parameter that can be passed onto shaders. Data that doesn’t belong to a specific vertex such as the camera’s location and direction can then be passed and used to render the scene.
-- Easy representation of uniform data
data Uniform = Uniform
  { uniformName   :: String
  , uniformData   :: UniformData
  }

-- Easy representation of uniform data
data UniformData where
  UniformData :: GL.Uniform a => a -> UniformData
  UniformDataMulti :: (GL.Uniform a, Storable a) => Vector a -> UniformData

-- Provide a list of uniforms to the supplied shader for rendering
applyUniforms :: Shader -> [Uniform] -> App ()
applyUniforms shader uniforms = do
  GL.currentProgram $= Just shader
  liftIO $ mapM_ f uniforms
  where f (Uniform name d) = do
            location <- GL.uniformLocation shader name
            case d of
              UniformData u -> GL.uniform location $= u
              UniformDataMulti v -> unsafeWith v $
                  GL.uniformv location (fromIntegral $ length v)
Uniforms attach a String to a piece of data that OpenGL can read, such as a floating point value, a vector or a matrix. The location of the uniform in shader code is found and provided with the Uniform’s value.
Inside the Map’s rendering function, you can see these Uniforms are applied to the loaded Shader resources. The map’s shader was bound in the GameScene snippet and given to this rendering function as shader — the map shader uses instanced rendering to render all those hexagonal prisms in one draw call.
-- Allow maps to be rendered
instance Renderable Map where
  render = renderMap

-- Create the relevant uniforms for a given tile
makeUniforms :: Index -> Int -> [Uniform]
makeUniforms pos height = [transform]
  where transform = Uniform "transform"
          (UniformData $ makeTransform pos height)

-- Render every tile on the map
renderMap :: Map -> Shader -> [Uniform] -> App ()
renderMap map shader globalUniforms = do

  -- Retrieve resources
  Env { envResources = rs } <- ask

  -- Obtain the mesh from resources (or crash)
  mesh <- liftIO $ getMesh rs "hexagonal_prism"

  -- Apply global uniforms to all tiles (this also binds the shader)
  applyUniforms shader globalUniforms

  -- Bind VAO of mesh
  GL.bindVertexArrayObject $= Just (meshVAO mesh)

  -- Prepare to render the map
  let tiles = assembleTile <$> toList (mapTiles map)
      tileInfo = Uniform "tiles" (UniformDataMulti $ fromList tiles)
      offset = bufferOffset $ meshFirstIndex mesh

  -- Provide tile information to the shaders for instanced rendering
  applyUniforms shader [tileInfo]

  -- Render the map via instances of the hexagonal mesh
  liftIO $ GL.drawElementsInstanced
      GL.Triangles (meshNumIndices mesh) GL.UnsignedInt
      offset (fromIntegral $ length tiles)
The function GL.drawElementsInstanced is featured in this tutorial and is used to render multiple things in a single draw call. Essentially, when the map shader renders the hexagonal_prism mesh, it will do so multiple times (one time per instance). Each instance is then given an ID number, which is the only detail that differs between each tile. This ID number is used to find the details of the tile in the tiles uniform parameter, as an array of vectors of three. You can see how the details of each tile is used in the shader code below:
// map.vertex.glsl
#version 430 core
layout(location = 0) in vec3 inPosition;
uniform mat4 transform;
uniform mat4 view;
uniform mat4 projection;
uniform vec3 tiles[1000];
void main() {

  // Get the position of the vertex
  vec4 vPosition = vec4(inPosition, 1.0);

  // Calculate translation matrix for current primitive
  vec3 tile = tiles[gl_InstanceID];
  float visible = clamp(tile.z, 0, 1);
  mat4 tileM = mat4(1.0, 0.0, 0.0, 0.0,
                    visible, tile.z, 0.0, 0.0,
                    0.0, 0.0, visible, 0.0,
                    tile.x, 0.0, tile.y, 1.0);

  // Calculate final position
  gl_Position = projection * view * transform * tileM * vPosition;
}
Building
As with any other standard Haskell project, you can install Stack and build it like so:
stack build
stack run
Thanks for reading!


