
A live demo of this project can be found here.
GitHub repository for this website can be found here.
What is this?
I build this as part of my introduction to both Haxe and Heaps. I started off with their sample projects and iterated until I had a good handle about what tools were available. The result is something similar to another project of mine, HexagonalHS.
You can test this project live at https://aas.sh/Hex-Voronoi.
How was it made?
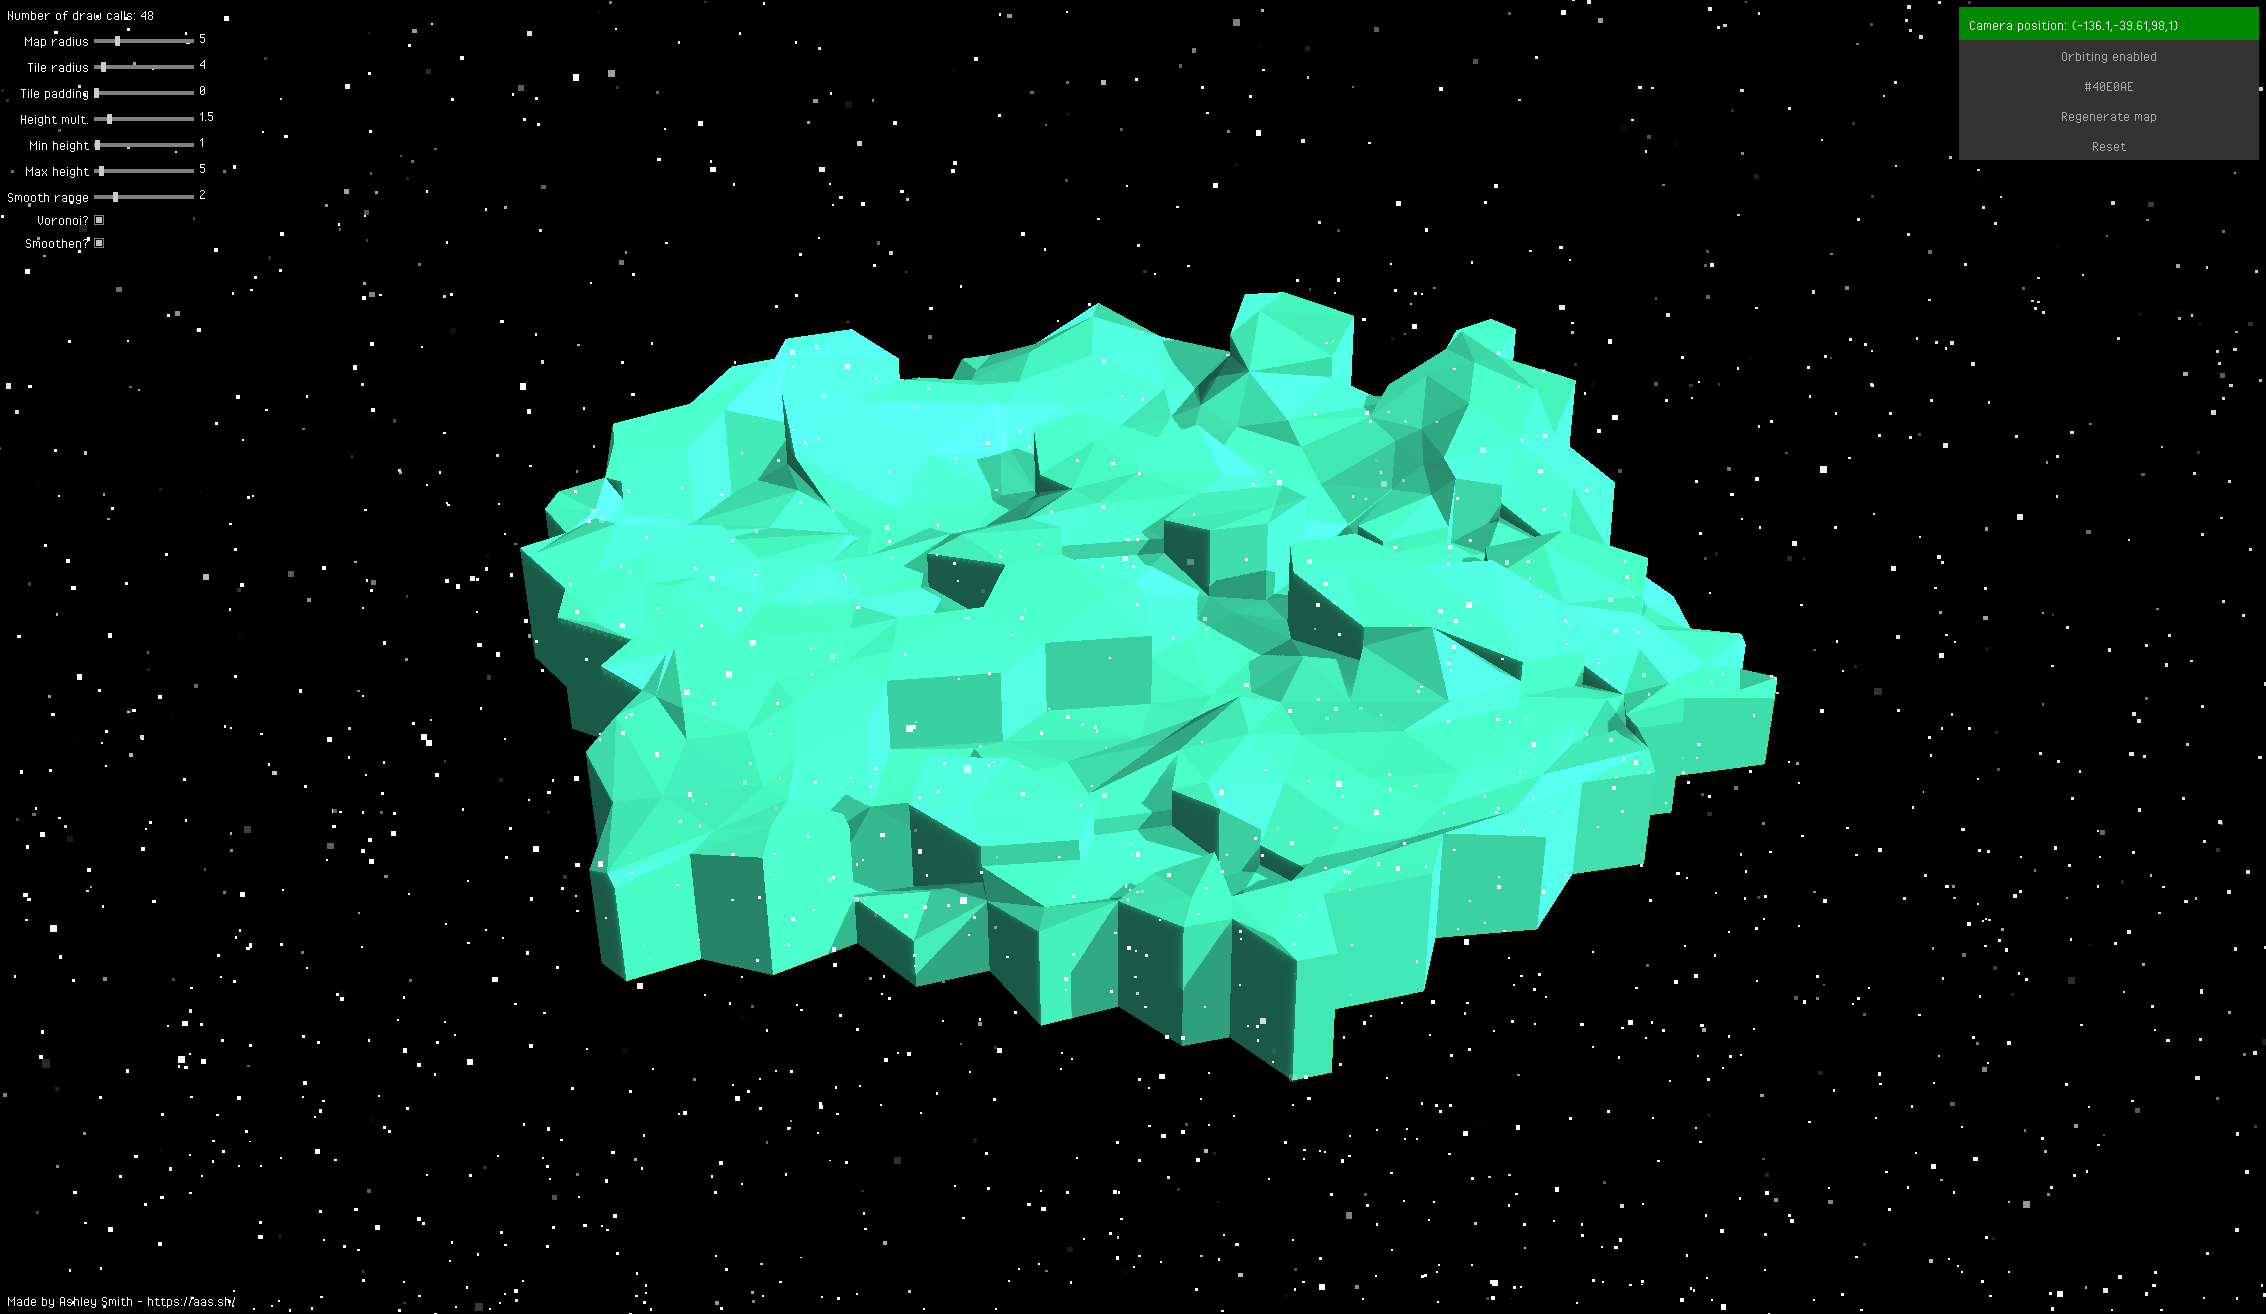
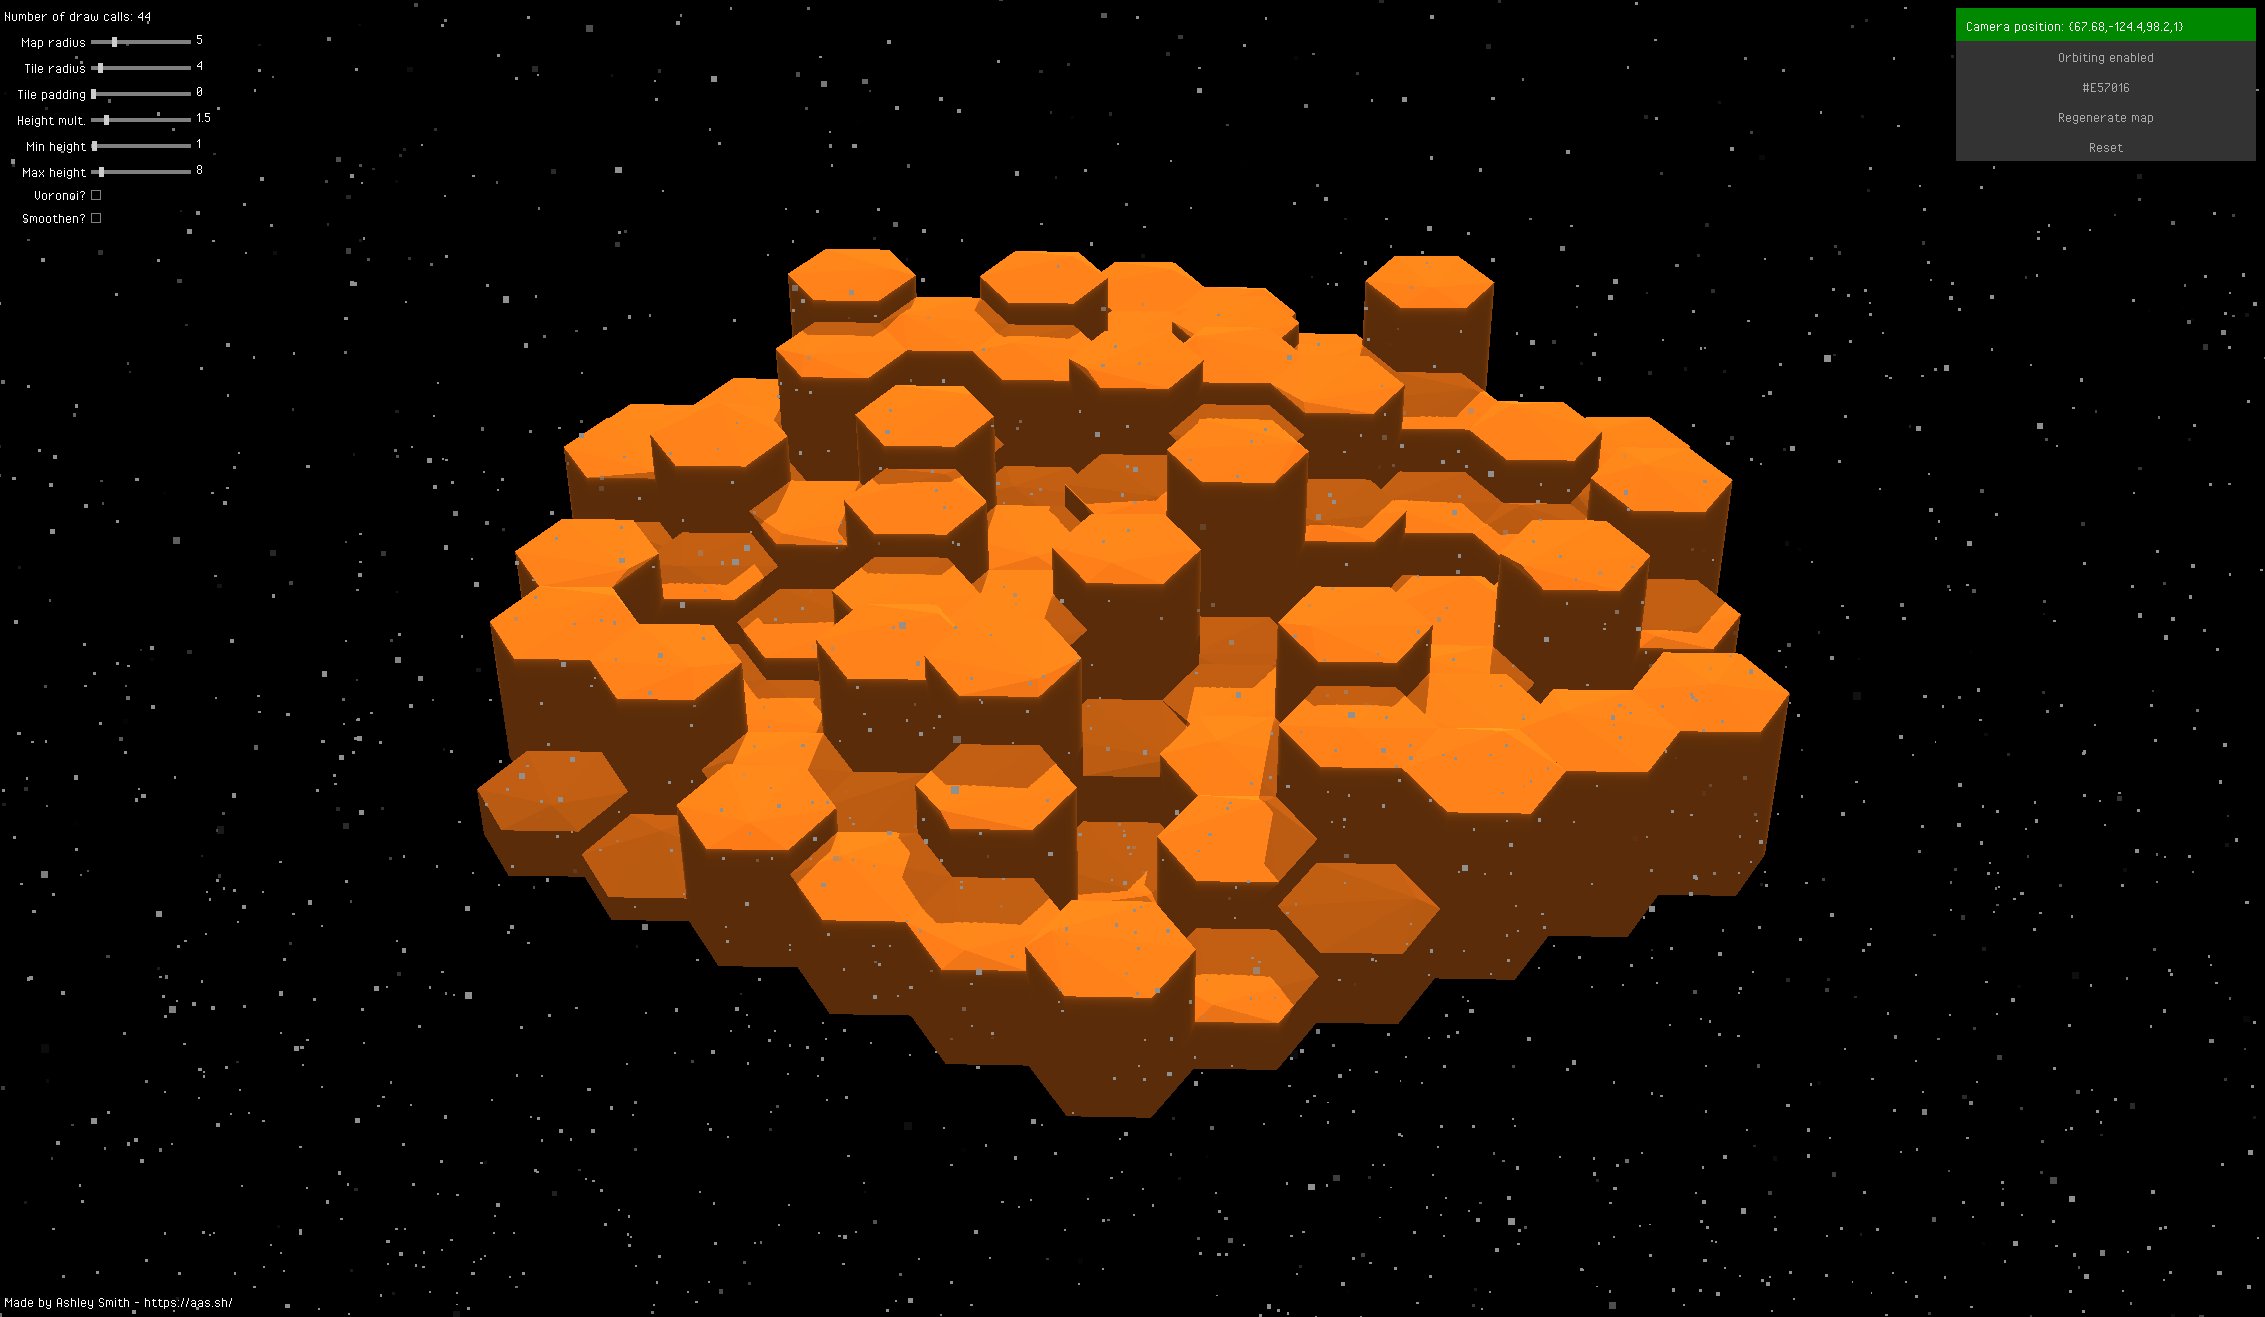
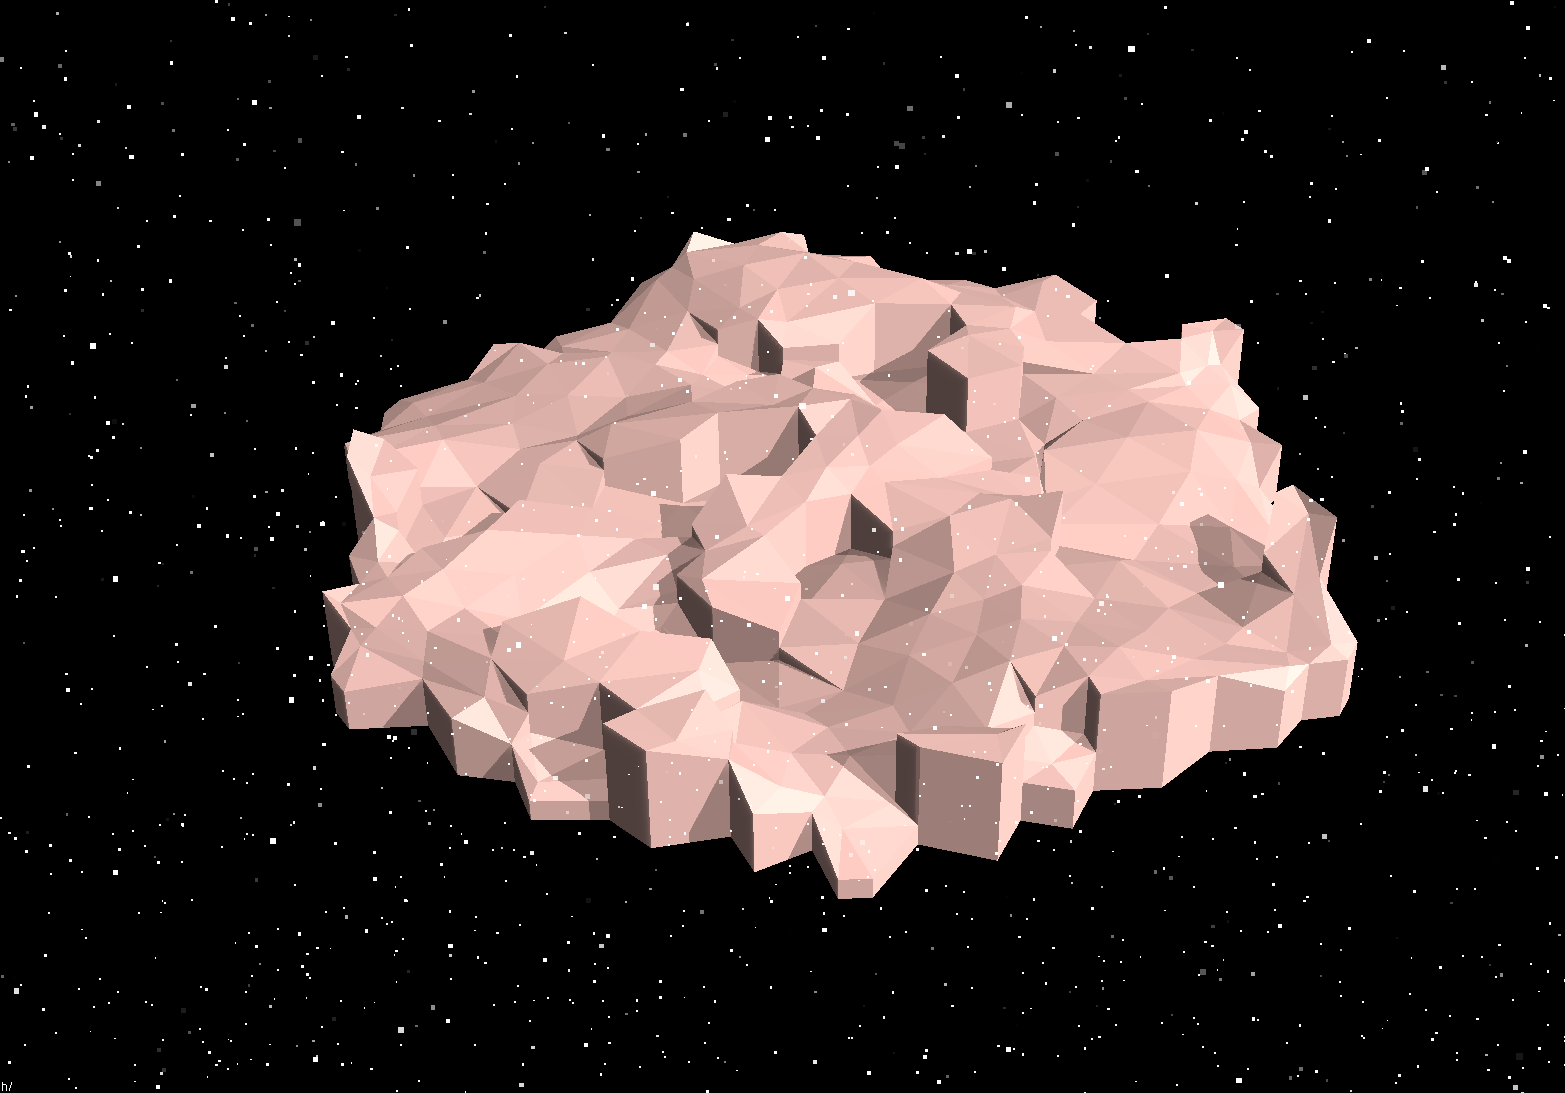
This application features a generated mesh made up of hexagonal tiles of varying heights. This itself isn’t too difficult, especially when you follow the teachings of Red Blob Games. However, these tiles are transformed and deformed to completely alter the overall shape of the landscape.
Generating hexagonal tiles
You can find all the code for actually creating the hexagonal tiles here. I essentially made a class to represent tiles that contain their centers and the world position of each of their 6 corners. The basics of this are described in that Red Blob Games post, but below is the entire snippet of code generating these hexagons:
public function new (
  pos : Axial,
  height : Int,
  size : Float,
  padding : Float,
  heightMultiplier : Float,
  random : Random) {

  // Record variables for convenience
  this.pos = pos;
  this.height = height;
  this.size = size;
  this.padding = padding;
  this.heightMultiplier = heightMultiplier;

  // Calculate perfect center of hexagon
  final width = Math.sqrt(3) * (size + padding);
  center = new Vec3(
      (pos.q * width ) + (pos.r * width * 0.5),
      (pos.r * (size + padding) * (3 / 2)),
      height * heightMultiplier);

  // Generate corners of a regular hexagon
  corners = [for (i in 0...6) {
      final angleDeg = 60 * i - 30;
      final angleRad = Math.PI / 180.0 * angleDeg;
      new Vec3(center.x + size * Math.cos(angleRad),
                center.y + size * Math.sin(angleRad),
                height * heightMultiplier);
  }];
}
Applying voronoi
Next, I started to transform the grid into a voronoi pattern. In nature, voronoi patterns appear in things like bubbles, where a shape is ‘inflated’ until its boundaries collide with other boundaries. The trick is to select a point inside a shape and then ‘inflate’ from there. You can find all the code below here.
To select the location, I separated each hexagon into 3 rhombi around the centre. I then chose a point by randomly traversing the lengths of the rhombus, where each side is equal to the radius of the hexagon to any of its corners.
// The code below is appended to the 'new' function shown above
// Split the hexagon into 3 rhombi and choose one
final selectedCorner = random.randomInt(0, 2) * 2;
final corner = corners[selectedCorner];
final nextCorner = corners[selectedCorner + 1];
var toCenter = center.sub(corner);
toCenter.normalize();
var toNext = nextCorner.sub(corner);
toNext.normalize();

// Randomly select a feature point within the rhombus (and hexagon)
final i = toCenter.multiply(random.random() * size);
final j = toNext.multiply(random.random() * size);
featurePoint = corner.add(i).add(j);
After selecting these points for each hexagon, I then iterated through the list of hexagons to ‘inflate them’. Recall that each corner of a hexagonal tesselation is in contact with three hexagons, meaning that other than the current hexagon, we need to locate these other two hexagons. These hexagons may not exist if the current hexagon is on the border of your grid.
We use these feature points (the name I gave to that randomly selected location we picked earlier) to distort each hexagon in relation to those closest to them. Since we started with pattern of tesselated, regular hexagons, we know that we aren’t going to get more than 3 feature points for any corner since the other corners will act as the contact points in the ‘inflation’ process. It’s hard to explain, but if you visualise the process of picking these points and drawing a line that’s equidistant between them, you’ll see that the way other corners distort results in there only ever being 3 feature points to consider per hexagon.
for (tile in tiles) {

  // Hard code directions for iterating around the tile
  final dirs = [
    new Axial( 1, 0),
    new Axial( 0, 1),
    new Axial(-1, 1),
    new Axial(-1, 0),
    new Axial( 0,-1),
    new Axial( 1,-1)
  ];

  // Iterate for each corner and direction
  for (i in 0 ... 6) {

    // Prepare to reposition corner
    final prevDir = dirs[i > 0 ? i - 1: 5];
    final nextDir = dirs[i];
    final prevTile = getTileAt(Axial.add(tile.pos, prevDir));
    final nextTile = getTileAt(Axial.add(tile.pos, nextDir));

    // ...
Next, we need to find the midpoint of the three hexagons in contact’s feature points. To get the midpoint of three points, simply take the averages of their x, y and z (although I only wanted x and y here, since I manipulated z in other ways to ‘smoothen’ the map).
// Find midpoint between adjacent neighbours
var midpoint = if (prevTile != null) {

  // Both tiles valid - 3 way midpoint
  if (nextTile != null) {
    tile.featurePoint
        .add(prevTile.featurePoint)
        .add(nextTile.featurePoint)
        .multiply(1. / 3.);
  }
  // Just previous tile valid - 2 way midpoint
  else {
    tile.featurePoint
        .add(prevTile.featurePoint)
        .multiply(0.5);
  }
}
else {
  // Just next tile valid - 2 way midpoint
  if (nextTile != null) {
    tile.featurePoint
        .add(nextTile.featurePoint)
        .multiply(0.5);
  }
  // No neighbours - do whatever
  else {
    tile.featurePoint
        .add(tile.corners[i])
        .multiply(0.5);
  }
}

// Apply voronoi if requested
if (voronoi) {

  // If tiles have padding, shift midpoint to tile center
  if (tilePadding > 0) {
    final z = midpoint.z;
    var toCenter = tile.center.sub(midpoint);
    toCenter.normalize();
    toCenter = toCenter.multiply(tilePadding);
    midpoint = midpoint.add(toCenter);
    midpoint.z = z;
  }

  // Set location of corner to resulting midpoint
  tile.corners[i].x = midpoint.x;
  tile.corners[i].y = midpoint.y;
}
And with that, we have our voronoi pattern! We don’t need to worry about the edges, since the corners are where the boundries converge, and so by handling the corners the edges just line into place.
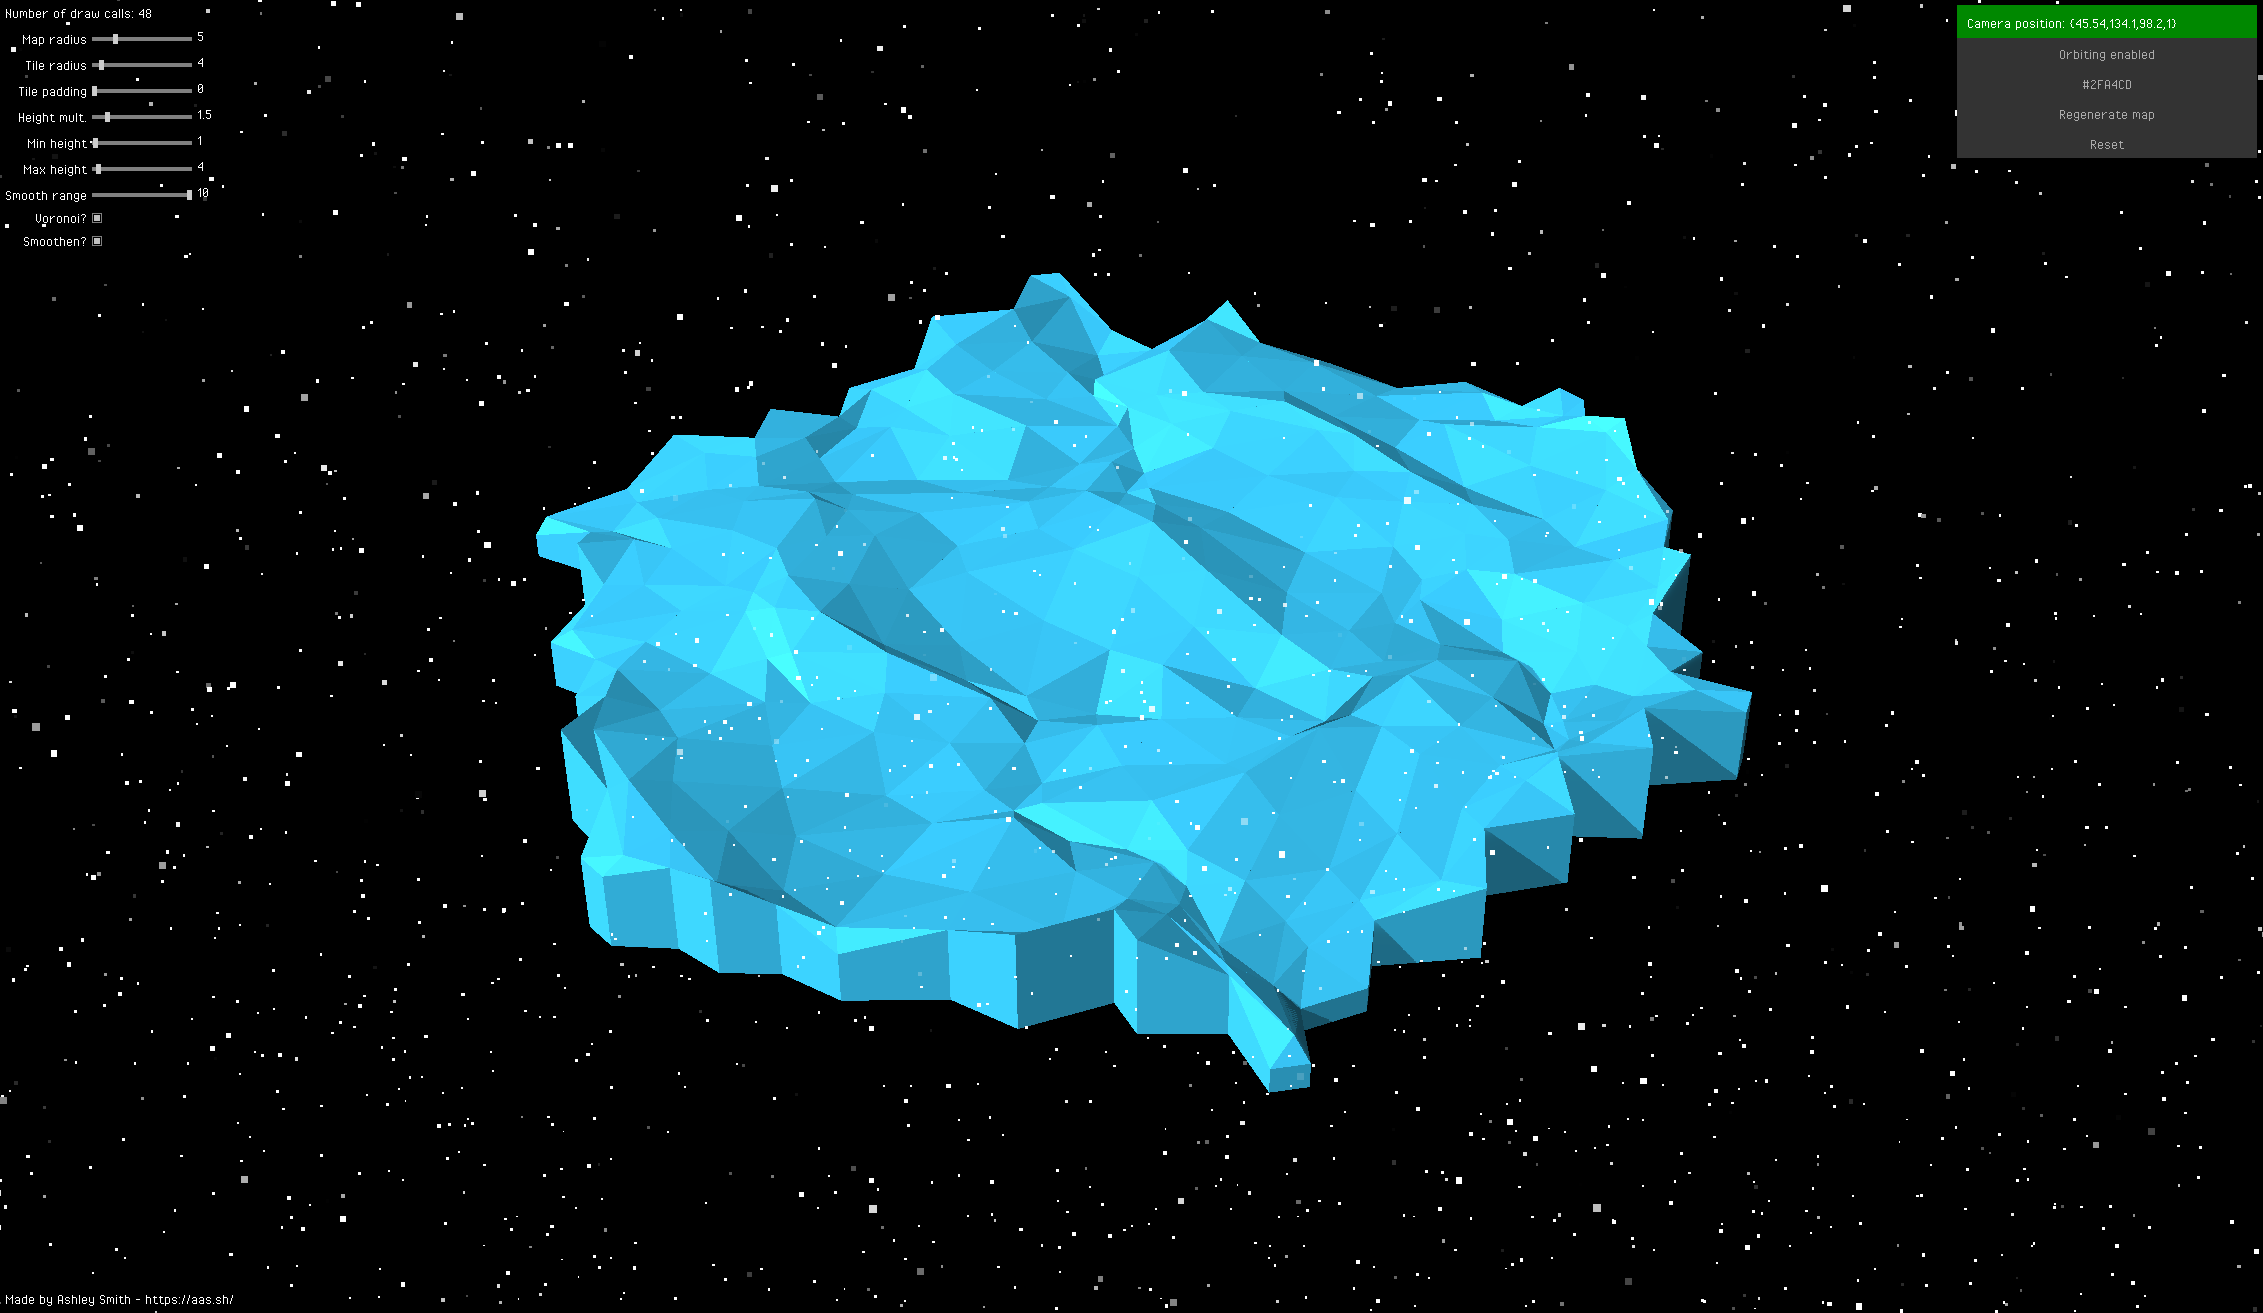
Smoothing
One of the options of this project is the ‘smoothing’ feature. This feature allows the sides of a tile to blend into the tile adjacent, forming ramps where possible. Below is a preview of how this looks:


Example of how smoothing effects maps with and without voronoi applied.
Smoothing is performed by simply taking the average Z coordinate of all tile vertices that touch. This is essentially the same as the voronoi application with three subtle differences:
- Smoothing can be enabled independently of voronoi
- Voronoi application only cares about XY position so that there’s no gaps in the terrain
- You might not always want to smoothen edges
Point 3 is interesting: take 3 tiles that touch at a single corner. One tile has height of 1, the second a height of 2 and the last a height of 3. If you smoothen the Z coordinate, nothing changes since the average height is 2. Instead, I decided to only smoothen when tiles are within a certain height range of each other (which can be chosen at runtime). This means that in that example, a ‘smoothen height’ of 1 would mean that the first and second tile get smoothed into a ramp, but the final tile remains as a cliff, since the difference between the highest and lowest tiles is greater than the smoothing value. This was done with the following snippets:
// Smoothing logic for 3-way corners
if (smoothen) {

  // Always include current tile
  var count = 1;
  smoothedZ = tile.height;

  // Include previous tile in smoothing if applicable
  if (Math.abs(prevTile.height - tile.height) <= smoothRange) {
    smoothedZ += prevTile.height;
    count += 1;
  }

  // Include next tile in smoothing if applicable
  if (Math.abs(nextTile.height - tile.height) <= smoothRange) {
    smoothedZ += nextTile.height;
    count += 1;
  }

  // Average all applicable tile heights
  smoothedZ /= count;
  smoothedZ *= tileHeightMultiplier;
}

// Smoothing logic for 2-way corners (using nextTile as an example)
if (smoothen && Math.abs(nextTile.height - tile.height) <= smoothRange) {
  smoothedZ = (tile.height + nextTile.height) *
      tileHeightMultiplier * 0.5;
}
How do I use it?
By default, the application will rotate around the map. You can disable this orbiting mode in the top right corner. From there, you can control the camera with your mouse and zoom in with the scroll wheel.
In the top left, you’ll find various settings for changing how the terrain looks. In the top right, you’ll find functions like changing the map’s colour, regenerating the map, and resetting all settings to default.
How do I compile it?
This project was created using Haxe and can be compiled in two ways. Before attempting compilation, you’ll need to install Haxe and Heaps. Additionally, you’ll need to install seedyrng and domkit via haxelib install <package>.
Visual Studio Code:
Haxe works very well with Visual Studio Code when using the Haxe Extension Pack. When everything is installed, you should be able to hit CTRL+SHIFT+B to build the project. It’ll compile to JS and be found in the docs folder, which you can then test by opening index.html in your web browser.
Command line:
After installing dependencies, you can run haxe build.hxml to compile the project. A JS file will appear in the docs folder and you can then test it by opening index.html in your web browser.